Showing posts with label try it. Show all posts

Thursday, February 24, 2011

Try it Thursday - Masking

On Thursdays, I share something for you to try.


Masking is a basic technique that you don't need any special supplies for, but it can create a great effect. For this card, I cut a piece of paper (computer or lined - you want thin paper for this) to 4 1/4" x 5 1/2" so it was slightly bigger than the paper I was stamping on. I folded it in half, then tore a piece out of the middle along the fold. I stuck it onto my Whisper White cardstock (3 3/4" x 5") with temporary adhesive and sponged inside the torn hole with River Rock ink. I stamped over the sponging (keeping the mask on) with my En Francais background stamp and River Rock ink. Then I took the mask off and stamped the flower image from Just Believe with Riding Hood Red ink. The sentiment is from Something to Celebrate (hostess set) and I tied a piece of Baja Breeze Seam Binding around the bottom of the stamped panel. Some Baja Breeze cardstock frames the stamped panel on my card. I hope you give masking a try!

Thursday, February 17, 2011

Try It Thursday - Watercolor Wonder Crayons

On Try it Thursdays, I try something new, and invite you to try too...

This is the second card we're making in my Technique Class this weekend:


I coloured with various Watercolor Wonder Crayons (more than one colour on most of the flowers) directly on the rubber part of the stamp. Then I misted with water, and stamped it onto Naturals White cardstock. I love the Framed Tulips Embossing Folder, and after I embossed the Melon Mambo cardstock, I gently rubbed my Whisper White ink pad over the raised areas.

Stamps: Upsy Daisy, Something to Celebrate
Inks: Melon Mambo, Whisper White craft ink
Cardstock: Naturals White, Melon Mambo, Crumb Cake, Rich Razzleberry (textured)
Other: Elegant Soiree DSP, Metallic Brads, Framed Tulips TIF, Brights Watercolor Wonder Crayons


Thursday, January 6, 2011

Try it Thursday - Stamp on Patterned Paper

Happy New Year! I hope you enjoyed some time with family and friends over the past few weeks. It was busy around here, and I'm happy to be back to normal. I didn't do much stamping, but I do have a few things to share. The Occasions Mini Catalogue started on Tuesday, and I have some new favourites. This card shows one of the: Clearly for You. I really like the vintage-style images, and I'm looking forward to making some inserts for my Simply Adorned necklace with it soon.


I used several of the images to create this Z-Fold card (the card I swapped at my downline meeting last month), and I stamped the butterfly onto another new favourite, the First Edition DSP (also in the Occasions Mini). This adds some interest and colour to a neutral paper.

Stamps: Clearly for You
Cardstock: Pretty in Pink, Chocolate Chip, Very Vanilla
Punches: Scallop Oval, Large Oval
Inks: Rich Razzleberry, Pretty in  Pink, Chocolate Chip
Other: First Edition DSP

Thursday, December 16, 2010

Try it Thursday - Letterpress plates

On Thursdays, I try something new, and invite you to try it too!


Stampin' Up! introduced Letterpress plates for the Big Shot in the Holiday Mini Catalogue, and I thought I'd get one to at least try it and see what I thought. You ink the raised portions of the plate with Craft ink (I used Real Red and Old Olive Stampin' Spots so I would get two colours). Then it goes through the Big Shot with paper (they recommend Watercolour paper, but I used Naturals White paper). My photo didn't capture the debossed effect very well, but it does look nice in person. My paper slid a little, and it's not perfect, so I inked the edges to disguise it a little...

Inks: Real Red & Old Olive Craft ink
Cardstock: Real Red, Naturals White, Pear Pizazz
Other: Old Olive 1/8" Taffeta Ribbon, Scallop Trim edge punch, Joyful Season letterpress plate, Holly Jolly DSP

Shannon West made a video for Stampin' Up! which includes some very good tips & tricks to be successful with the Letterpress plates: http://www.youtube.com/watch?v=BJpeQ7fL5mw

Thursday, November 18, 2010

Try it Thursday - Embossed Ribbon

On Thursdays, I try something new, and invite you to try it too!


This is the second card we're making at my Technique Class this weekend. We're embossing the ribbon with the Big Shot and a Textured Impressions Folder (which didn't photograph well, unfortunately). I still have spots in the Sunday classes, so let me know if you'd like to come over and try this technique too!

Stamps: Contempo Christmas
Inks: Cherry Cobbler, Early Expresso
Cardstock: Very Vanilla, Naturals White, Old Olive
Other: Ornament Punch, Very Vanilla Satin Ribbon, Square Lattice Big Shot die, Holly Jolly DSP

Thursday, October 14, 2010

Try it Thursday - Cut it apart!

On Thursdays, I try something new, and invite you to try it too!

This is the second card we'll be making in my Technique Class this weekend. After I stamped and embossed the flower image from Inspired by Nature, I cut it apart. I sponged different colours (chosen with the Colour Coach) onto each piece, and put them back together on some Basic Black cardstock leaving a small space between each piece. It's a very simple 'technique' and you don't have to make a grid... this would look great cut into strips too, but I really like it because it gives me another way to use some of my favourite silhouette images. If you create something using this technique, I hope you'll share... I'd love to see it!
 
 
Stamps: Inspired by Nature
Inks: Always Artichoke, Perfect Plum, Soft Suede, Cajun Craze, VersaMark
Cardstock: Naturals White, Basic Black, Cajun Craze
Other: Black Stampin' Emboss powder, Paper Trimmer, Linen Thread, Stampin' Sponge, Regals Button, Eyelet Border punch

Thursday, September 23, 2010

Try it Thursday - Fancy Favor Luminary

On Thursdays, I try something new, and invite you to try it too!


I saw this idea (or something like it) somewhere online at least a year ago and I've finally tried it out. I ran some textured Rich Razzleberry cardstock through my Fancy Favour Big Shot die and then cut the top inch off the top. I cut the bottom section an inch from the bottom score lines too. Then I ran a piece of Vellum Cardstock (2 3/4" x 11") through the Elegant Bouquet Textured Impressions Folder twice (once at each end). I stuck Sticky Strip along the edges of the Rich Razzleberry pieces and stuck the Vellum Cardstock to the rest of the Fancy Favour box. I used my Bone Folder to score the Vellum Cardtock with the Fancy Favour pieces, and stuck it together like I normally would. I have a battery powered tealight to put inside my luminary.

This is one of the projects from my Home Decor Class this weekend... it helps pass the drying time required for a couple of the other projects.

Cardstock: Rich Razzleberry (textured), Vellum Cardstock
Big Shot: Fancy Favor die, Elegant Bouquet Textured Impressions folder
Other: Sticky Strip, Two-Way Glue

Thursday, September 16, 2010

Try it Thursday - Wheeled Frame

On Thursdays, I try something new, and invite you to try it too!

I have to admit that I don't use my Stampin' Around wheels very often lately, and when I do, I just wheel them along to make a straight border or strip. Sometimes I'll do a whole background to add visual interest. I've never tried to make a mitred frame with my wheel... until today! It wasn't too difficult after a little trial and error. Post-it Notes were my friend (especially the longer ones) for masking the corners. I also needed to use my Wheel Guide to get nice straight stamping. My last tip is to cut a piece to go inside the frame to disguise any slight imperfections. Here's the card I came up with:
 
 
We'll be making it this weekend at my Technique Class (featuring Stampin' Around Wheels) this weekend. I still have some spots available if you're in the London, ON area and would like to make this card..
 
Stamps: Herb Expressions, Baroque Swirls Stampin' Around Wheel
Inks: Old Artichoke, Rose Red, Perfect Plum
Cardstock: Sahara Sand, Pink Pirouette, Rose Red
Other: Always Artichoke Seam Binding, Sweet & Sour DSP, Blender Pen, Wheel Guide, Rhinestone Brad

Thursday, September 9, 2010

Try it Thursday - Ribbon through Ribbon punch

On Thursdays, I try something new, and invite you to try it too!

This week's Technique challenge at Stampin' Addicts (anyone can join... lots of great inspiration and challenges) is to weave ribbon through Dotted Scallop Ribbon punched cardstock. It's super easy, and I love the effect (one more reason to put the Dotted Scallop Ribbon Border Punch on your wish list). All you do is cut a slit from one dot to the next (I did every other set) and then weave the 1/8" Taffeta ribbon through the slits. I used it as an accent on this layout from my Scrapbook Class this Sunday.


You can see a close up on the right. I used the Early Expresso 1/8" Taffeta Ribbon. This month's scrapbook theme is Monochromatic, so when you register for the class, you can choose which colour you'd like your layout to be (red, orange, yellow, green, blue, turquoise, purple, or pink).

If you try this technique, I'd love to see it... link me up in the comments!

Thursday, September 2, 2010

Try it Thursday - Decorative Label

On Thursdays, I try something new, and invite you to try it too!


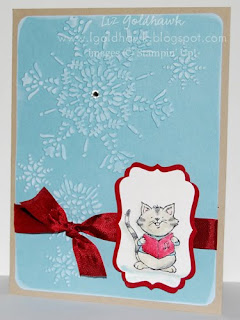
Chris thinks I'm crazy to be stamping for Christmas already, but the Holiday Mini makes it so fun! I'm also getting ready for my Holiday Mini Kick-Off this weekend--this is one of the cards we'll be making! I still have a few spots, so if you're in the London, ON area and you'd like to make this card, please contact me to register. I did leave this card without a sentiment so it could be used as a non-Christmas card...

 I love this new Decorative Label punch from the Holiday Mini, but I also love when I can ground a punch by matting it on a slightly larger punch. Since the Decorative Label is quite large, there isn't a punch the right size to go behind it. Luckily, I saw a fabulous video tutorial by Angela McKay and learned how to make my own! It's easy, and I hope you'll try it too! You can watch her video to learn how by clicking here.

Stamps: Merry Crittermas
Inks: Whisper White Craft, StazOn Jet Black, Sahara Sand, Basic Grey, Cherry Cobbler, Baja Breeze
Cardstock: Crumb Cake, Shimmery White, Baja Breeze, Cherry Cobbler
Other: Decorative Label Punch, Cherry Cobbler Seam Binding, Blender Pen, Northern Flurry Textured Impressions Folder, Basic Rhinestone

Friday, August 27, 2010

Try it Thursday!

On Try it Thursdays, sometimes I'll be sharing a new technique or product for you to try, sometimes I'll be trying a new technique for the first time, and sometimes I'll be trying a challenge I've found on another blog or website.

Today, I'm trying a new technique (and challenging you to try too) that I saw on Stampin' Addicts, and I'm trying a challenge from Splitcoast Stampers and combining them in one card. The technique challenge from Stampin' Addicts is to stamp with your clear block. Just ink it up like you would ink a stamp, and press it onto your cardstock... easy peasy and I love the effect (it really grounds the rest of my stamping)! The Clean & Simple challenge from Splitcoast is to use the colours Crumb Cake, Turquoise and White on a card. Here is the result:


Are you up for the challenge? You don't have to do both challenges on one card, but I hope you'll try at least one out! Please link me up so I can see what you created!

Stamps: Just Believe, Silhouette Sentiments
Inks: Crumb Cake, Tempting Turquoise
Cardstock: Whisper White, Tempting Turquoise, Crumb Cake
Other: Stampin' Up Clear C block, Basic Pearls, Dotted Scallop Ribbon punch